When you buy a second-hand boat, one of our first reflex is to have a watch on keel's bolts to check if there are not fissures around, rust on bolts or just the presence of salt water in the bilges, evidence of an unfortunate encounter between the boat's keel and a rock or an other ofni lost during navigation. However even if all bolts and their places, if bilges and ribs seem healthy, the boat's lift may show the ravages of time, and it was unfortunately my case. The seal was original(30 years)and began to take off seriously, Moreover, I had no difficulty to remove it, in five minutes and with just my hands it came quickly!
1)Before all
First of all let me say that this method works for a small boat(in my case a kelt 620), here no more than 500 kg in the keel with a small hull about 22 feet in length overall. For a bigger boat I think we need to take more precautions about how to block the keel and how to dispatch boat's weight on boat's supports(once the keel is down, hull's center is laying on nothing).
First anticipation: if you expect to do that before boat's wintering, you must raise the boat on its supports to foresee space for keel's fall. you must foresee a space at least to clean the hull and keel's head, get rid of the old seal's remains, and also to set up a jack under the keel(in my case I used a Ford truck's jack, large enough so very stable under load). Personal I have been completely had because I have not foreseen that, and pay an additional lift if you can avoid it it's better. When you have foreseen the good space, we lay down the keel on boards like the following method:
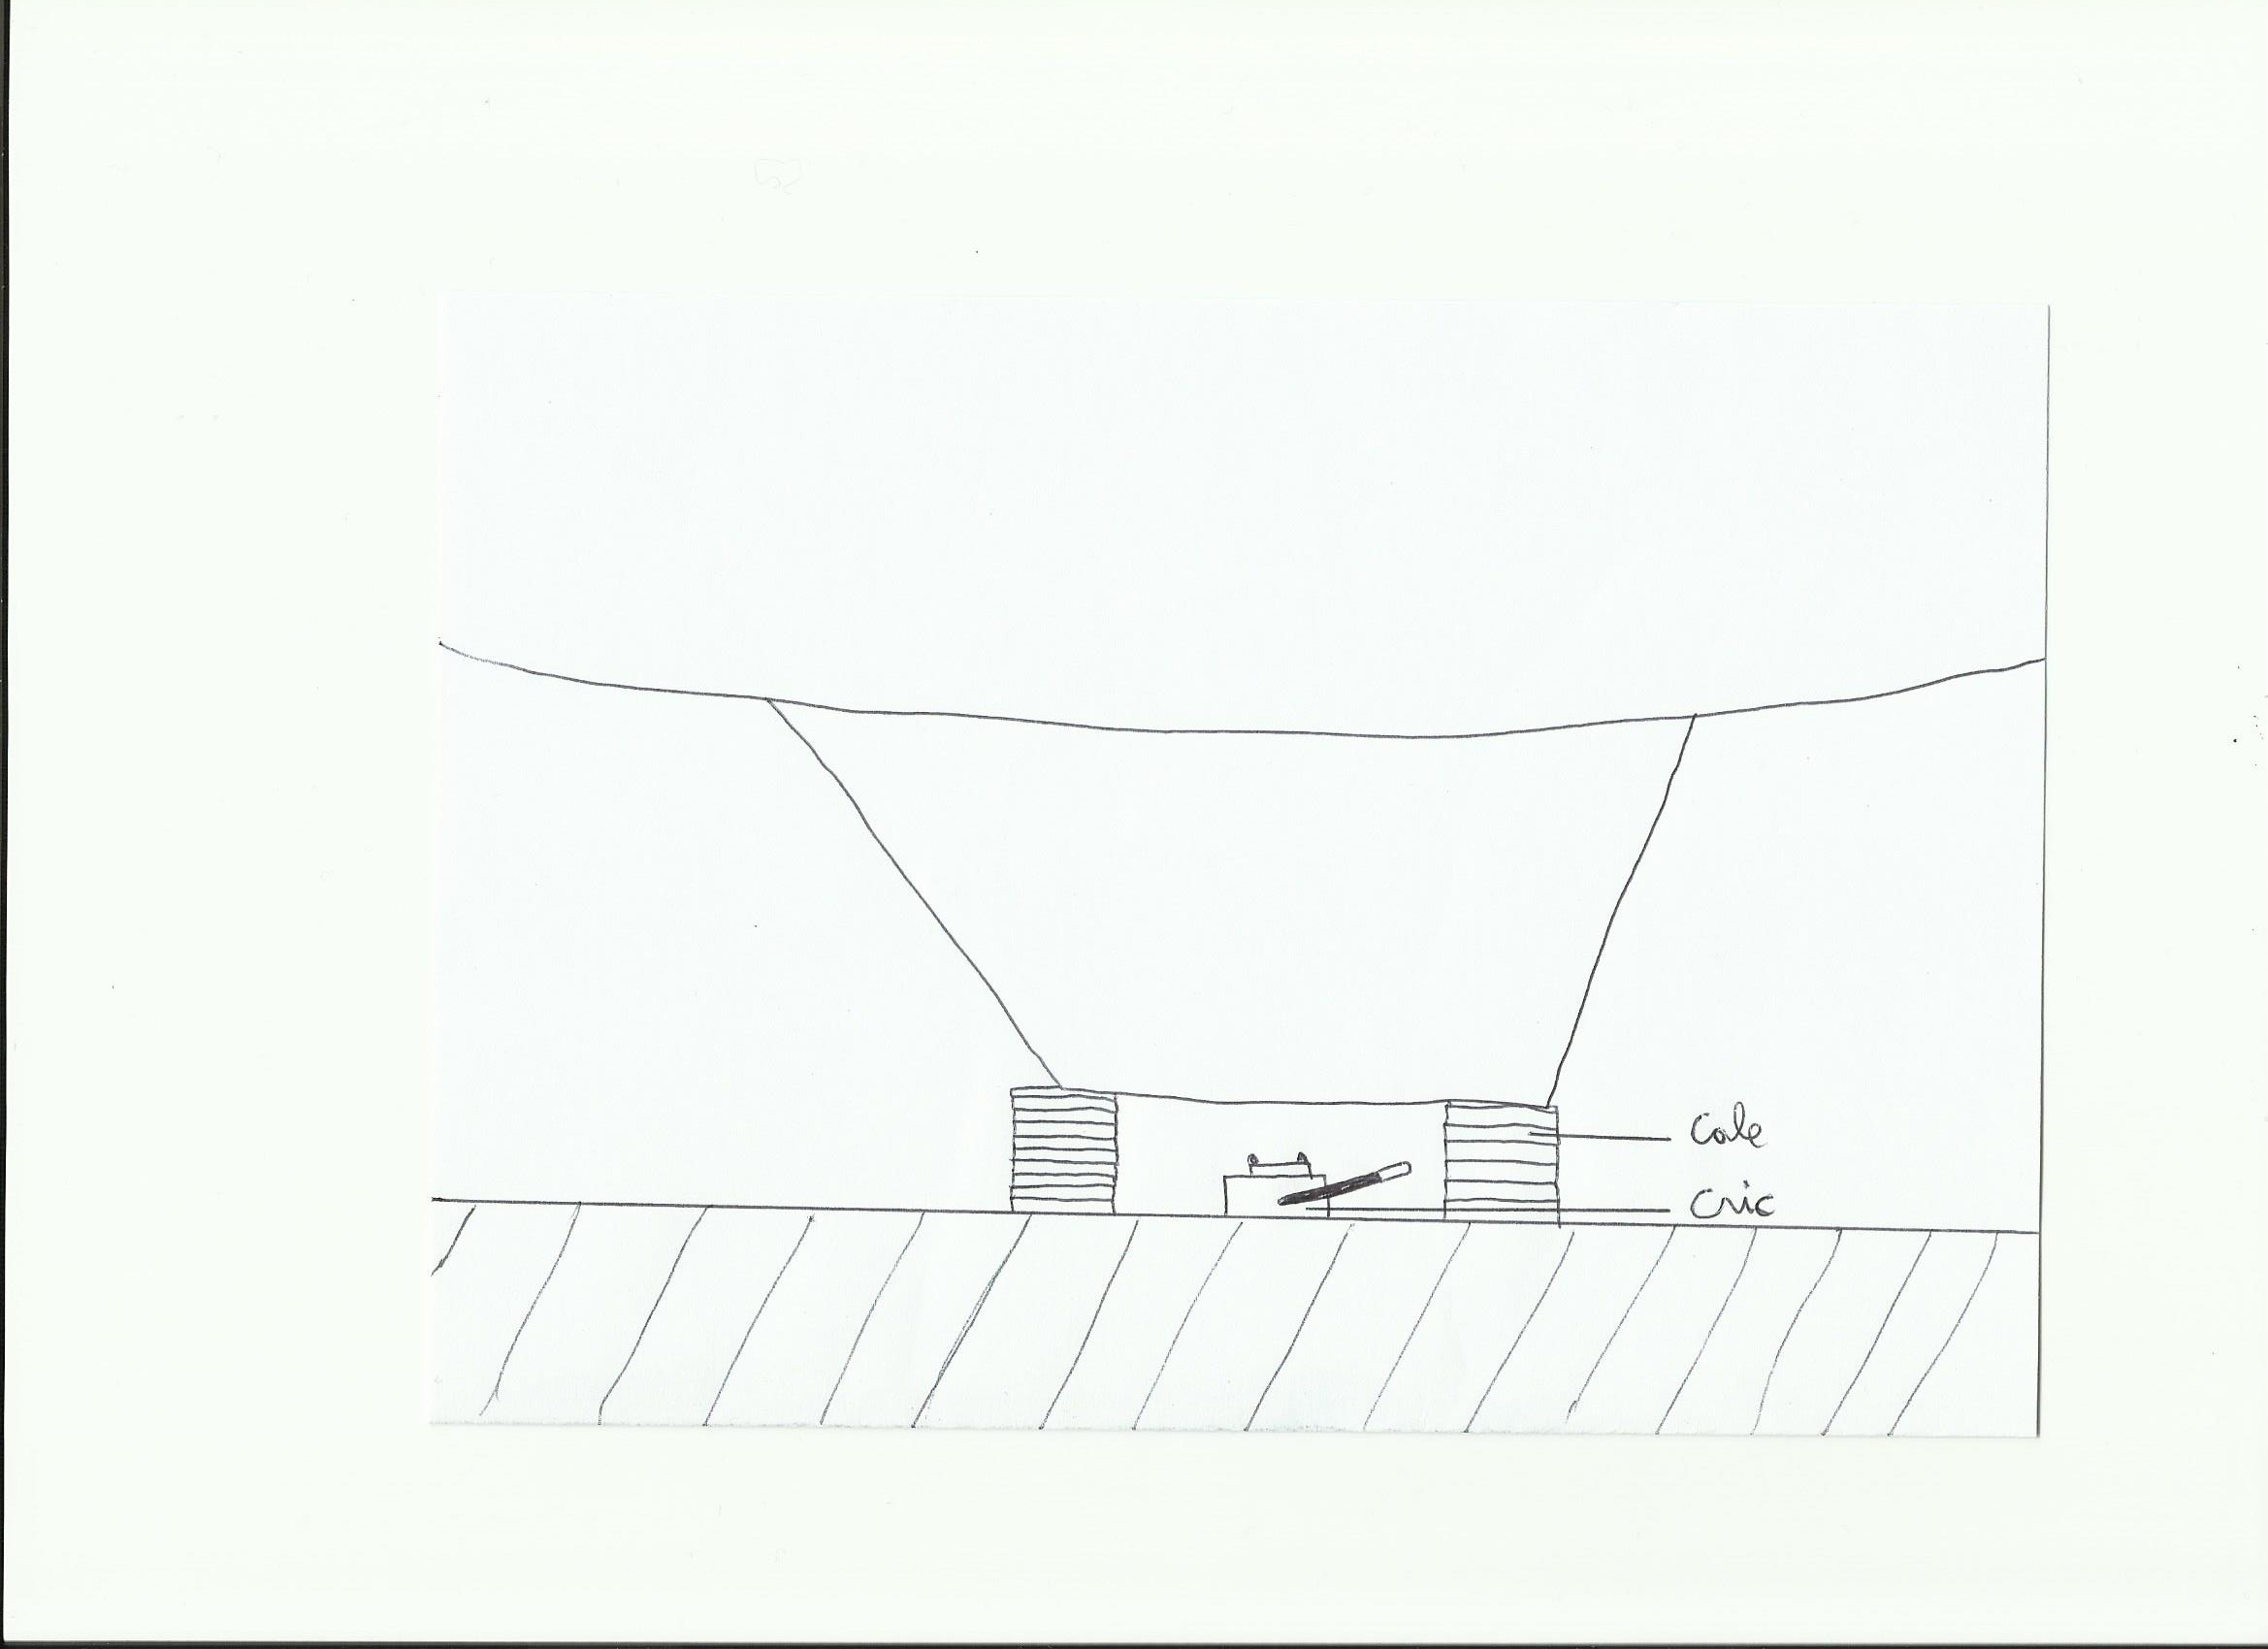
Wedges used should not be too thick, during keel's descent you may then do it smoothly , step by step while you are adjusting jack's place to balance the keel above.
Equipment used: we will need wd 40(if it will be difficult to unscrew the bolts), spare bolts A4 stainless steel(inox marine, the more resistant against corrosion)with nylstop nuts that go with( A4 too), four threaded stems corresponding to bolts diameter(with a good length) , and sikaflex type 291(specialized for sealing). For my little boat it has taken me 3 tubes of sika.
2)Let's go!
Before we turn down the keel of course we remove the old seal and all the keel bolts and back plates. Instead of it we set up the four threaded stems at the fourth ends of the keel, these ones will serve as guides and will support keel's weight during the fall. I also had previously put a wooden frame around the keel just in case, but finally it was unneeded.
![quille5 [70]](http://www.xn--bbures-amores-ieb.com/wp-content/uploads/2014/01/quille5-70.gif)
The threaded stems were widely enough to guide and secure the keel. In case of doubt I had also thought about putting tires on each side if all would fall down.
To install the threaded rods in a good way to avoid damages on keel bolts holes where they will pass, inside the boat we will pass them through wooden pieces like this(sorry I lost the photo, so I show a small diagram instead):
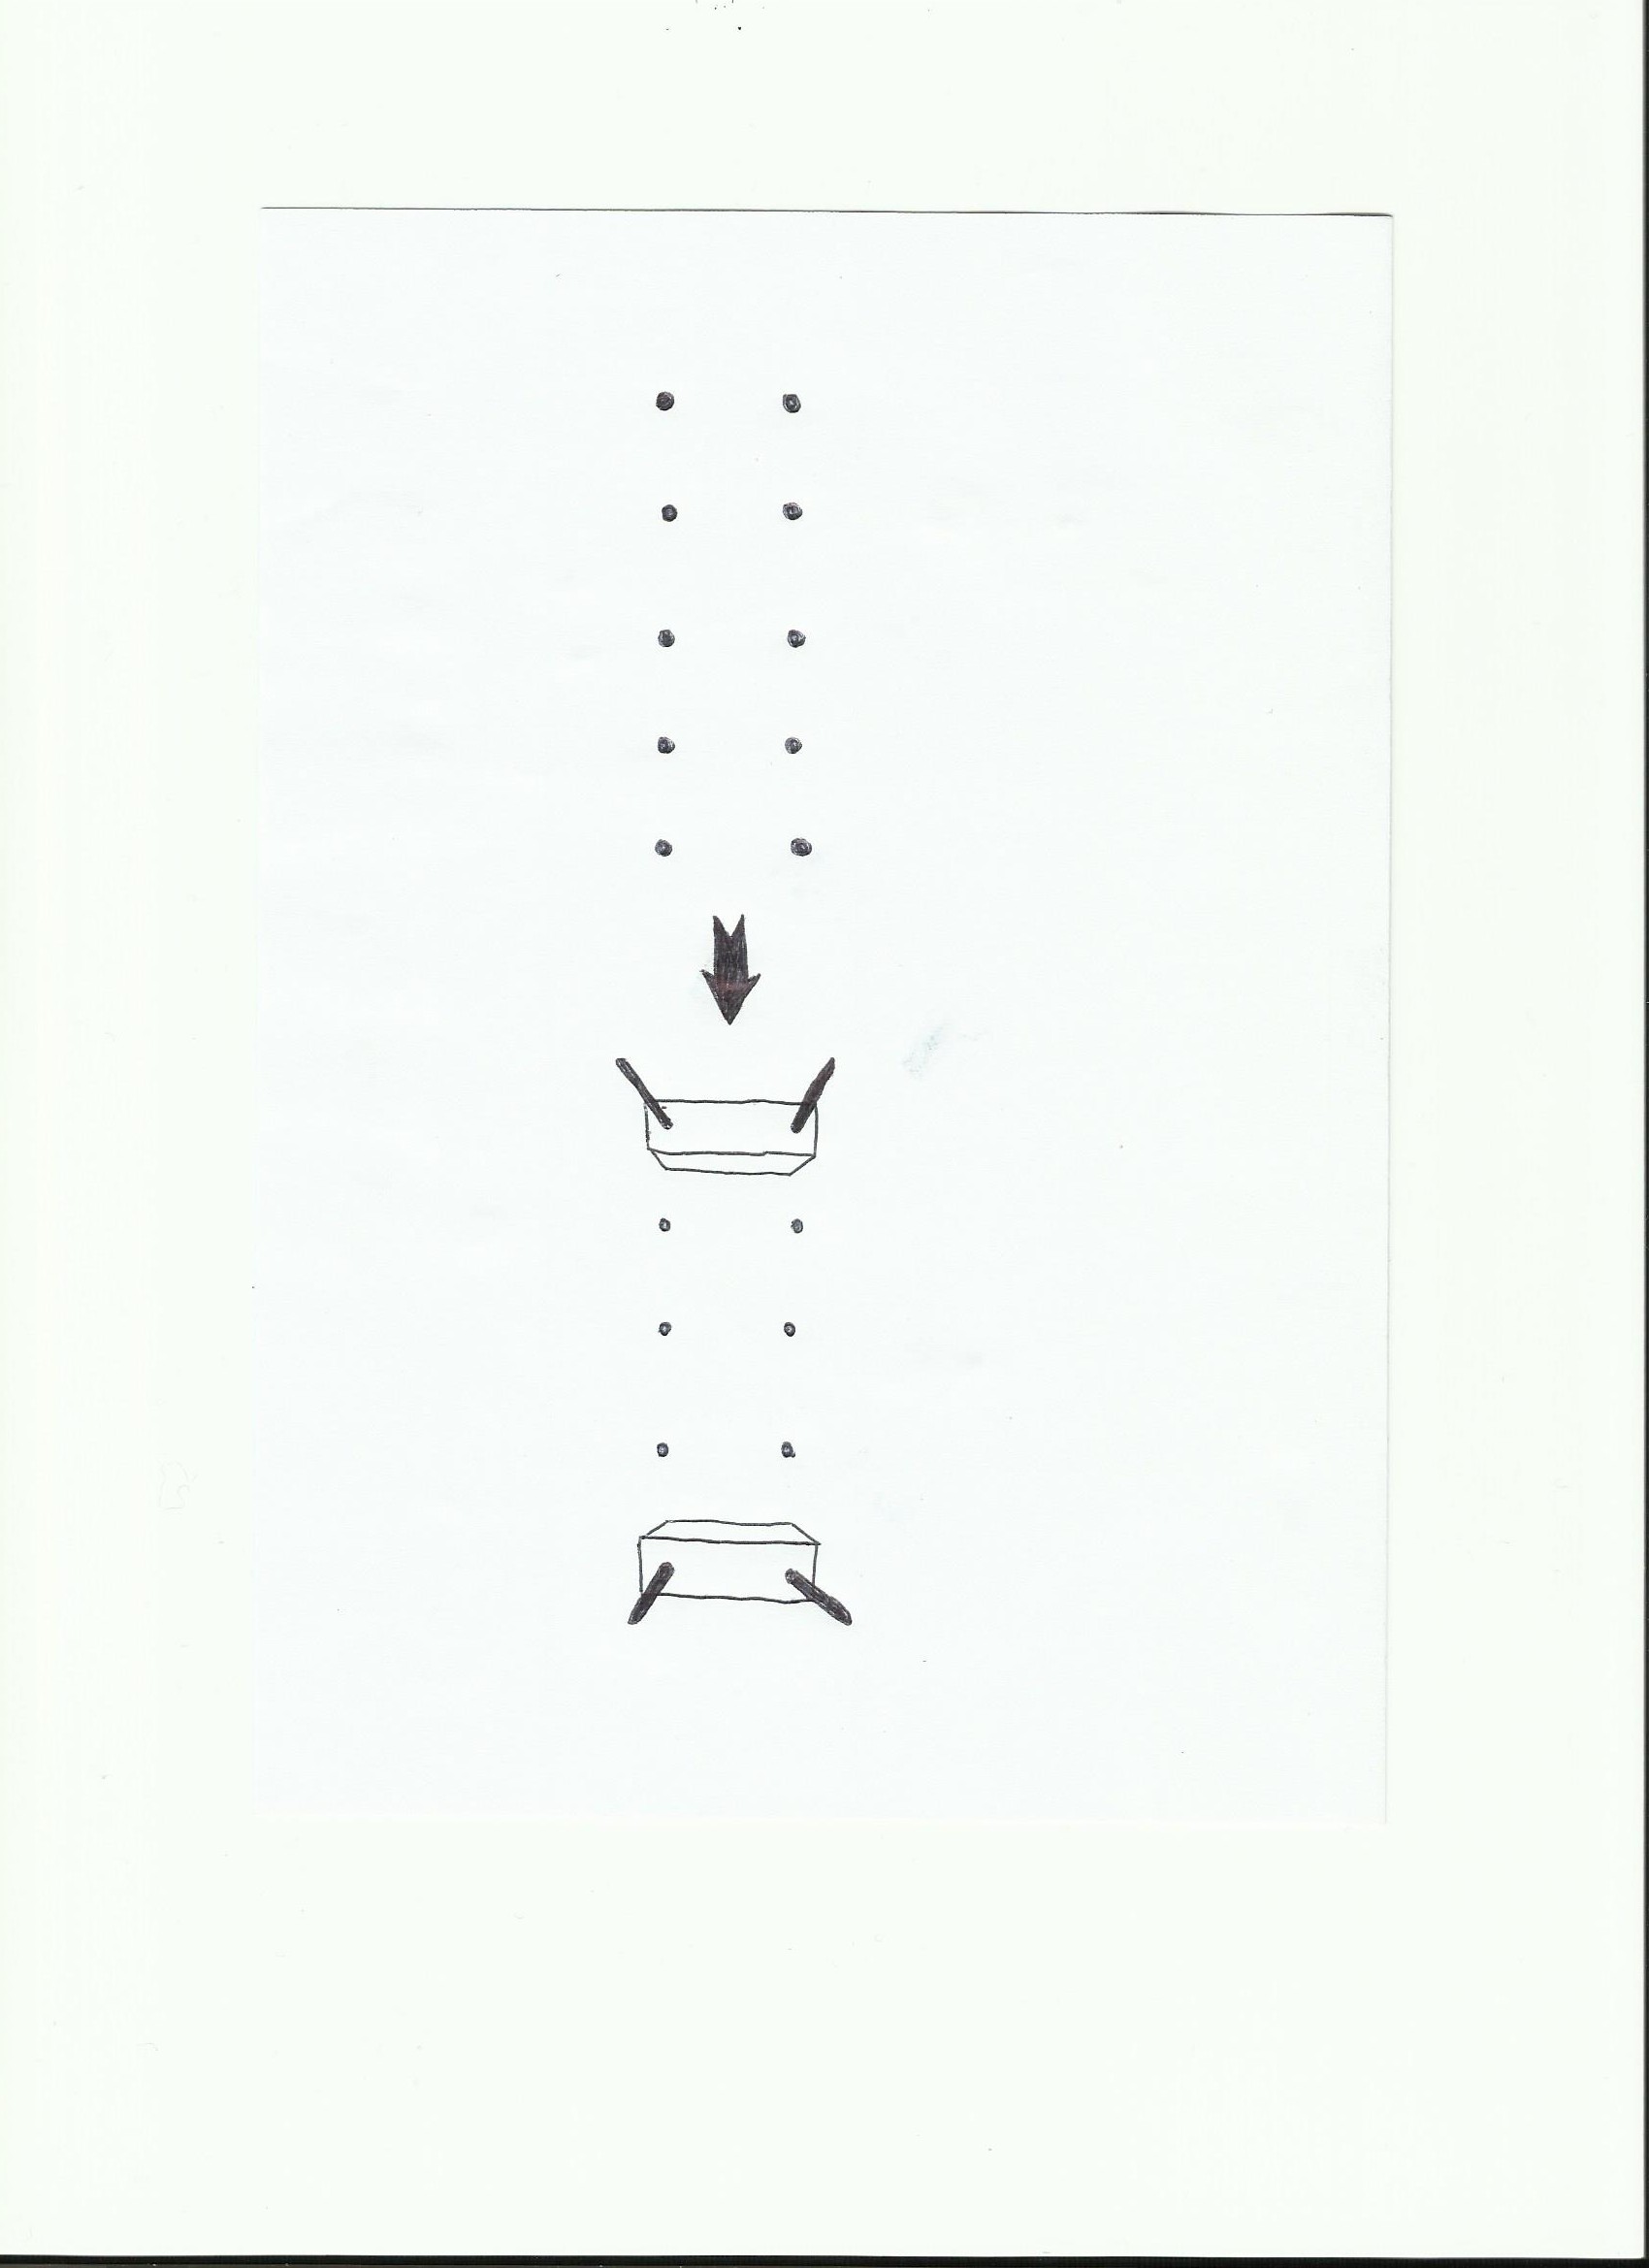
After passing the rods across the wooden pieces, we block them with the back plates(we may use back plates of the keel bolts)and nuts.
The keel fall is easy, we center as much as possible the jack under the keel and we set it up smoothly in support of the keel to be able to removes the two firsts wedges. When this is done and the keel no longer lays down on the jack, the jack is lowered slowly; in my case it did not come on now and I had to beat to the top of the ballast with a hammer(do not forget to use a wedge for it, do not hit directly on the ballast). When she descends and get supported on the following two wedges, we repeat the same thing until the time we get enough space to work on the keel.
To remove the old seal(at least what remains)I used a spatula to scrape and acetone, and finally sandpaper . It is very important to degrease the two surfaces in contact(keel / hull)at the maximum before doing the seal.
3)Time to rise it
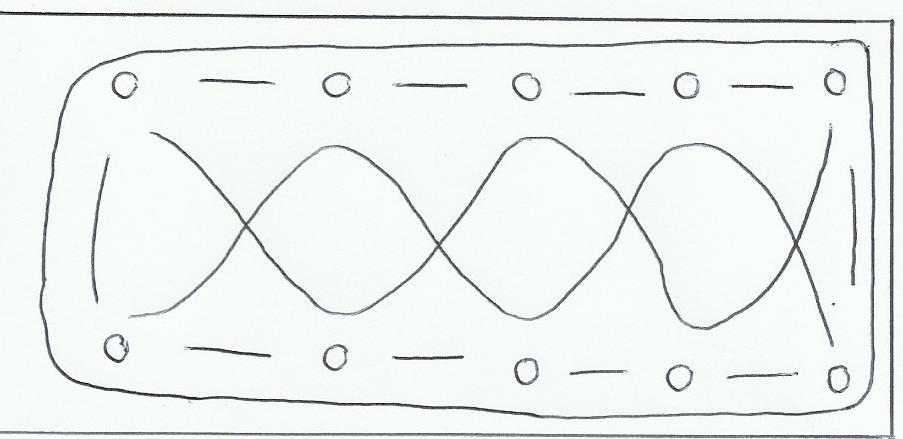
When I worked on the seal temperature was at least 20 ° C, so the sika has taken more time to harden and I had more time to work on it. Sika is applied to the head of the keel like the little drawing and outside hole's bolts :
Then we rise the keel with the jack and in the same time we put the wedges step by step under the keel. When the keel has returned to its initial level, if surfaces are in contact but Sika “doesn't overflow” enough it does not matter. We set up new keel bolts with sika on their length before screwing them(don't forget to put the back plates before!). We don't screw them at the maximum for the moment(foresee roughly five turns ahead before final tightening). Then you can remove the threaded rods and put bolts instead(the same don't tighten them at the maximum). Wait until the seal hardens to tighten everything at the maximum, it grows when it dries. If you tighten all at the max the first time, you may undo the seal when the boat will be lifted, and finally you would have done that for nothing…
![quille2 [70]](http://www.xn--bbures-amores-ieb.com/wp-content/uploads/2014/01/quille2-70.gif)
Finally, sika is added to have enough material for the seal around the edge of the keel. Especially use gloves(it has taken me three days to regain normal hands)and a flexible spatula to smooth the seal. To have a good smoothing you can dip your spatula in a dishwashing product. Finally we put sika on the bolt heads.
When all these things are done, expected two / three days to tighten all the bolts to the maximum. Now it's ready!
Article classe et informative, merci. Une question : Il y a il toujours une « fente » entre la coque et la quille sur le Kelt 620 ou est ce que c’est une indication que la quille bouge? D’habitude ce joint est couvert de gelcoat/polyester, no ? Je suis aller voir un Kelt 620 pas chère mais cette « ouverture » m’inquiète…
Hello, merci! Je ne sais pas si c’est le cas pour tout les kelt 620 mais le miens qui est une version quillard a un espace entre la quille et la coque; là où se situe la semelle de la quille(en fait c’est juste un gros joint en sikaflex)la semelle en sika permet d’amortir les vibrations de la quille.Ensuite normalement pour bien étanchéifier il y a un joint congé toujours en sika qui recouvre cette fente. Sur mon kelt j’ai du le refaire car il partait en lambeaux simplement à la main en tirant un peu dessus (il était d’origine). Bonne journée.